WordPress Pricing Table plugin is a unique and awesome tool for creating responsive and nice pricing tables on your WordPress website. Now you can create pricing tables just in a few minutes and start selling goods using our plugin nice themes. If you have any questions, suggestions about new features or issues with our plugin, then contact us at our plugin official support forum – here.
Unlimited Tables and Themes
You can create as many tables and themes as you need. We didn’t limit the number of column themes, so you can create columns with different themes. For example, if your pricing table has 5 columns, you can set 5 different themes for those columns.
This is a necessary option for getting unique designs. Also, as we say, you can create unlimited tables and use them on different pages.
Nice Column Scale Option
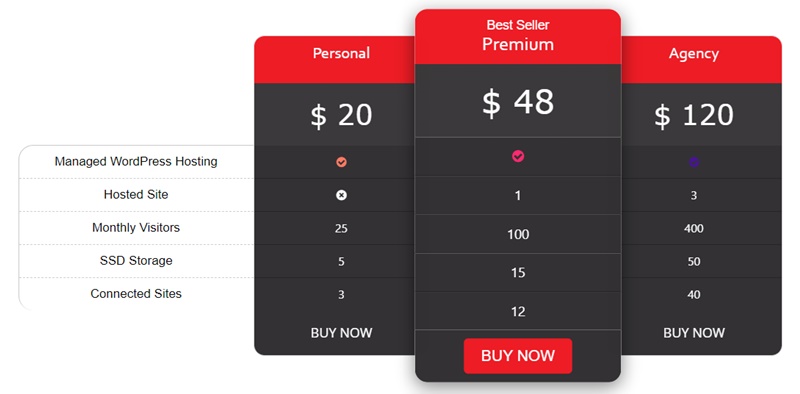
Column Scale option is another great option for creating unique designs. Using this option you can change the scale of one column and make it to look different than the other columns. This will give an extra nice view to that column.
You can use this option for example for the best deal or for the most popular plan. This will attract the attention of users and they will check the scaled column at first.


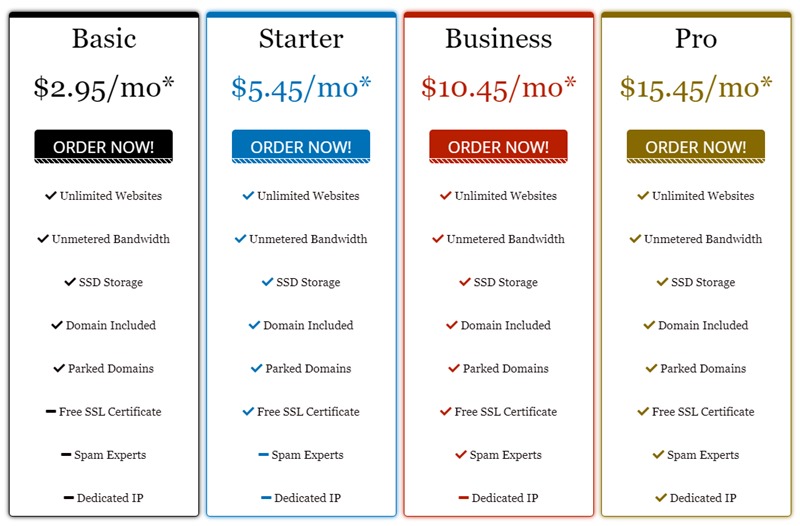
Check the Pricing Table demo page
Unique and Nice Animation Effects
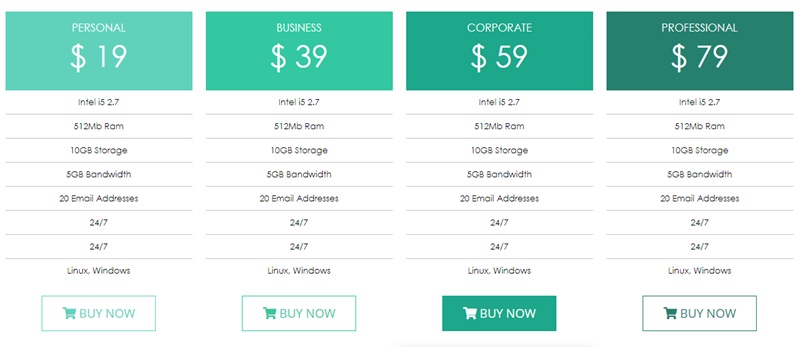
Our plugin has 37 nice and unique animation effects. You can use this animation effects for every column or just for the whole pricing table (we recommend to set different animation effects for different columns, it will give an extra nice view).
Use a specific animation or set animations random option.
Also, you can set the “Animation delay” option. If you need to show animations instantly, then set this option to 0 (if you want to set some delay, then type there the value in milliseconds).
500+ Nice Font Awesome Icons
You can use 500+ Font Awesome icons for adding nice buttons or icons to the Pricing table. You just need to click on the icon you need (from the right side of our plugin admin panel), then copy the code that appears and paste it to any column. Icons get the text style, so the color of the icon will be the same as you set for text.
For different plans, you can use icons from the same category with some differences. Use the whole functionality of our plugin and you will create the best pricing table!
Nice Gradient Colors
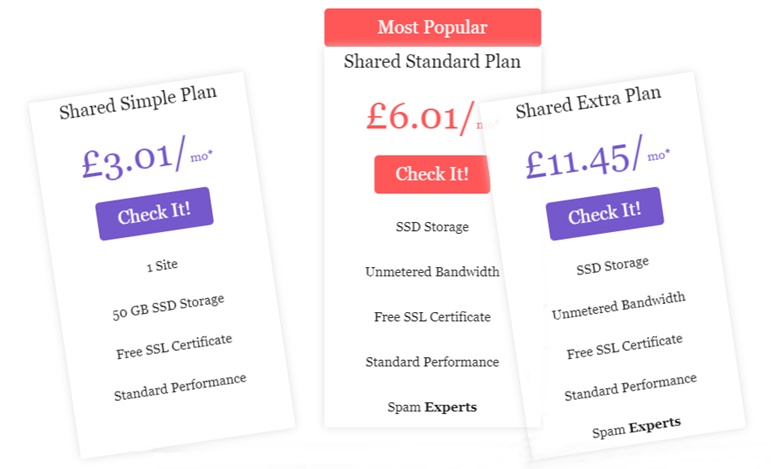
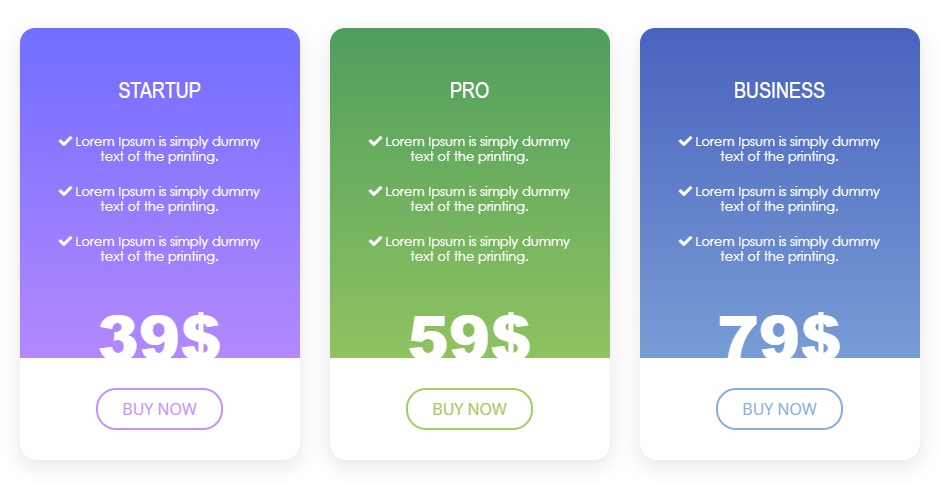
Gradient option is another great feature. You can use Gradient for columns backgrounds and get a nice designs. For example, we used Gradient feature for the first two pricing tables on our Demo page.
Backgrounds with the gradient option look better than simple colored backgrounds.
You can use the gradient option for title, price, features, buttons and additional text backgrounds.
WordPress Responsive Pricing Table Builder
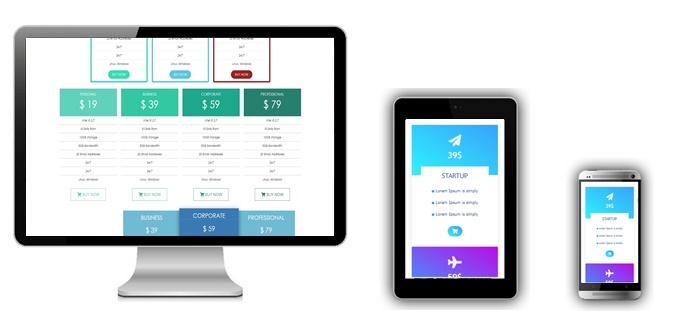
Our Pricing Table Builder has a responsive design, so you can use it on your WordPress website and don’t think about the mobile view, this table looks great on any device. Today’s mobile traffic is growing and every website should have a mobile-friendly design. If you didn’t think about it yet, then we recommend you to pay attention to this. For example, cooking websites nearly get 60-70% of traffic(search engine traffic) from mobile devices. We hope after this statistic you will pay attention to this.
For the mobile view, there is an important option “Column minimum width” (you will find it from admin panel Pricing table>Themes>General Settings tab), pay attention to this option if you want to change or configure the mobile view.
WordPress Pricing Table Plans
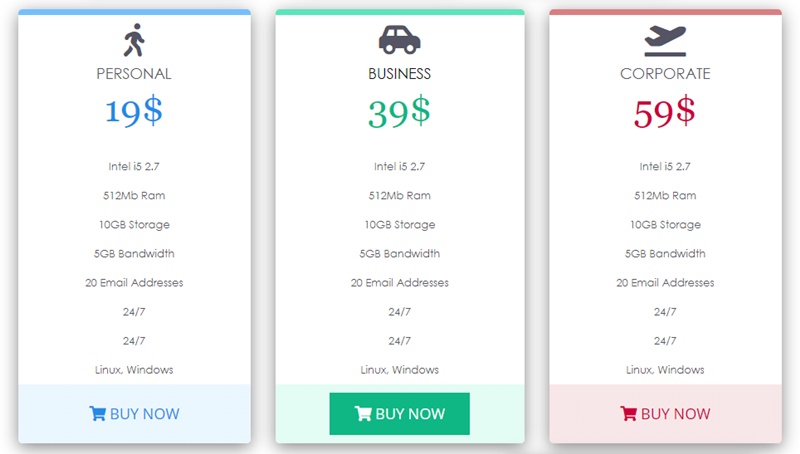
WordPress pricing table by WpDevArt has 3 premium plans. You can use the whole functionality in all 3 plans, the difference is the number of websites where you can use our plugin. You can use the Personal license only on 1 website, the Business license from 1 to 5 websites, the Developer license on unlimited websites.
We accept Credit Cards, PayPal, and Debit Cards payments!
WordPress Pricing Table Features
- Standard and easy instalation
- This plugin works great with all WordPress actual versions
- Pricing table has Responsive design
- Possibility to create unlimited pricing tables and themes
- Possibility to duplicate tables and themes just in a one click
- Possibility to change columns positions
- Possibility to select theme for each column
- Possibility to change the Distance between columns
- Possibility to add unlimited columns
- Possibility to set the Table position
- Use 500+ Font Awesome icons
- Possibility to set title, price, feature and additional text background colors
- Possibility to set title, price, feature and additional text colors
- Possibility to use padding options
- Possibility to use margin options
- Possibility to use border options(type, width, color, radius)
- Possibility to set font size, font family
- Possibility to set the additional text positions
- Possibility to use 20 Unique and Nice themes Premium
- Possibility to use 15 great button styles Premium
- Possibility to set Background Gradients Premium
- Possibility to set animation effects Premium
- Possibility to set animation effects delay Premium
- Possibility to set the Column scale Premium
- Possibility to set the Column outside box shadow Premium
- Possibility to set Column fields ordering Premium
- Possibility to use Column type option Premium
User Manual
Step 1: Installing and activating the plugin
- First of all, log in to your WordPress website adminisration panel.
- Then open Plugins page from admin panel menu, go to Add New page and click on the Upload Plugin button.
- Click on the “Choose file” button and select the Pricing table zip file(also, you can check our WordPress countdown plugin).
- After that just activate it.
- If any problem occurs, contact us using our contat page.
Step 1.1: Installing the Pricing table Premium Version
- After you purchased the plugin, the payment page will automatically redirect you to our website again. On the redirected page the plugin download will start automatically, also, you can download it manually if something goes wrong, you will find the download button from there.
- If you already use our plugin regular version, then at first you need to deactivate and delete the regular(free) version and only after that install the Premium version.
- Anyway, if something goes wrong and you couldn’t get the Premium version, then contact us and we will send it again.


How To create Pricing table for WordPress website?
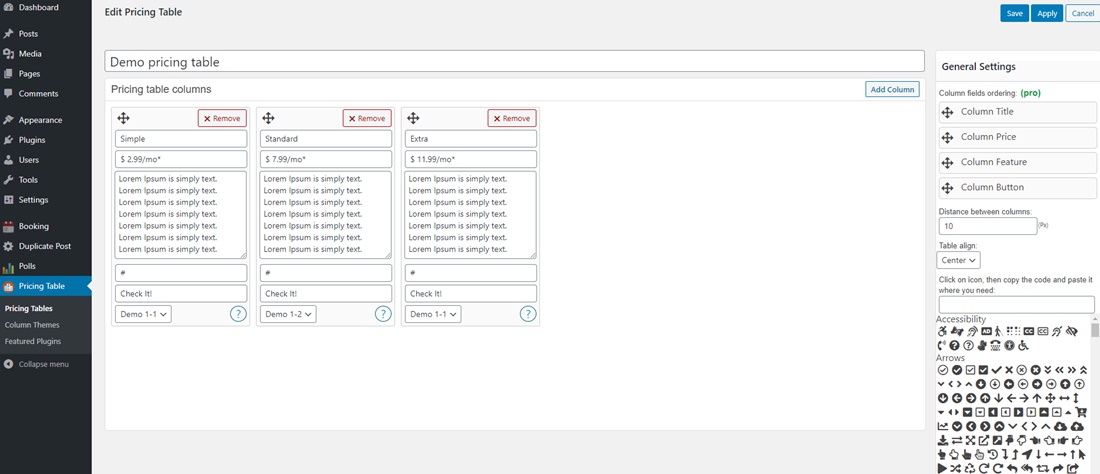
After installing the plugin go to the pricing table page from the admin panel and click on the Add New button. By default, the plugin creates two columns, if you want to add columns then click on the Add Column button from the right side. You can change column positions by pressing on the left side of the column. You can remove it by clicking on the Remove button from the column right side. After that add the column Title, Price, Features, Button URL, Button text and choose the column theme. You can change the column fields positions from the right side. After that configure the other two important parameters – “Distance between columns” and “Table align”. If you want to add Font Awesome icons, then choose the icon you need and then click on it. After that, the icon code will appear in the icon field(for example, it will look like this – < i class="fas fa-check-circle" >< /i >). Copy this code and paste it anywhere in the pricing table. Also, you can check our WordPress pricing table plugin page on WordPress.org.
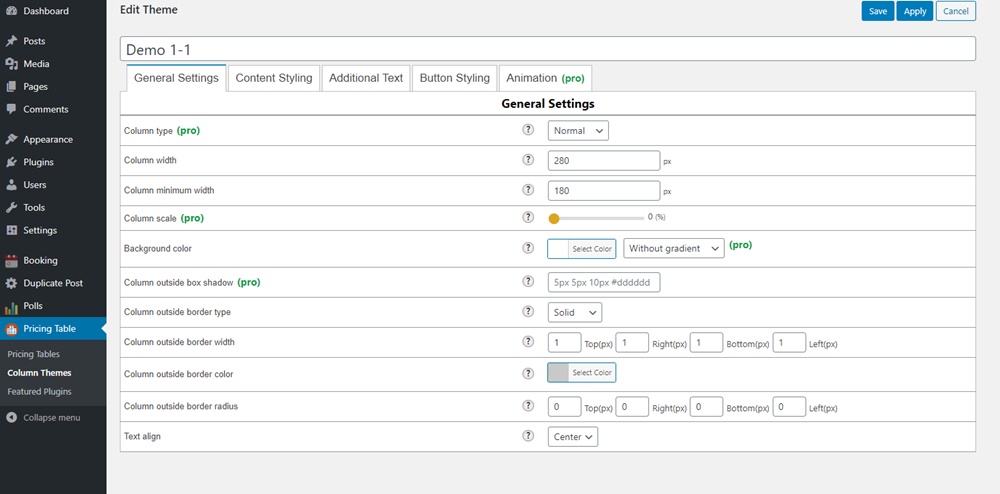
Then go to the Column Themes page and click on the Add New button again. Type the theme title and start configuring your first theme. From the General Settings tab, you can set global options, such as column type, width, minimum width, Column scale and other important options. From the Content Styling tab, you can set title, price and features fields styles. There are a lot of necessary and useful options that will give a nice view to your pricing tables, so check them all. The next tab is the Additional Text tab. You can configure the “Best deal” or “Most Popular” field from here. Type the additional text in the first field and start to configure the style of added text. From the Button Styling tab, you can create a nice design for Pricing table price buttons. It will give an extra nice view, so give attention to this tab as well. The last tab is the Animation effect tab. There are two options in this tab. The first option is the Animation effect. Choose the one you prefer, then configure the second option(Animation delay). After saving the column theme don’t forget to open the pricing table page and select the theme you added.
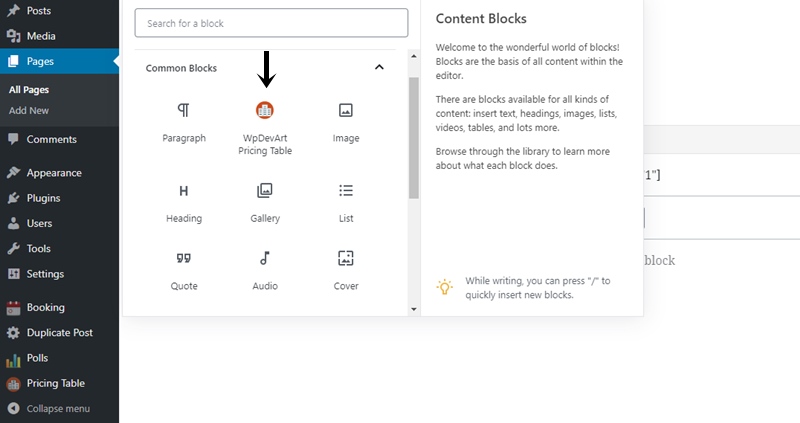
That’s all, now you can insert the pricing table into your website posts and pages. Go to the post/page editor and then use our plugin shortcode button for inserting it. You can find the insert button from the “Common Blocks” tab or from the shortcode buttons list. Click on the shortcode button and then select the table you need to show on your post/page.
Screenshots