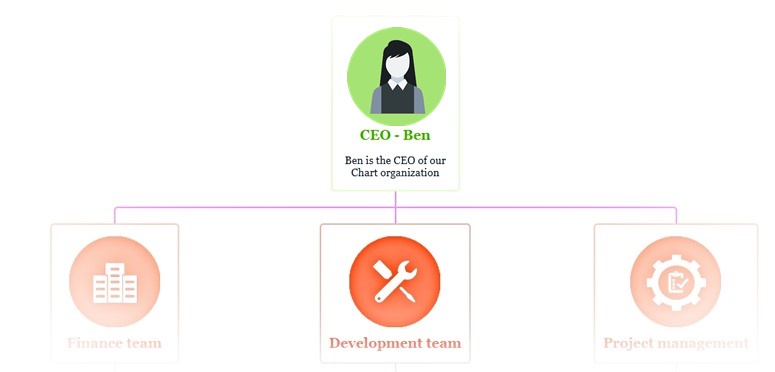
WordPress organization chart plugin

WordPress Organization Chart plugin is a great and unique tool for building nice organizational charts for your company. It’s very simple to use, so you can create different charts in a few minutes. If you have any issue occurring with our organization chart plugin or want to see more functionality(or just have a suggestion about our plugin), then create a topic at our plugin official forum – here.

Unlimited Organization Charts and Themes

You can create as many organization charts as you need, there isn’t any limitation in this case.

Also, there isn’t any limitation for the chart themes, You can create different themes with different designs.

Each organization chart element can have a different theme, so you can create any design for the global chart.

Duplicate Option

We added a duplicate functionality. You can easily duplicate charts if you need to create several charts.

Also, you can duplicate the chart themes.

Just click on the “Duplicate” button from the admin panel and our plugin will immediately create the theme duplicate

Fully Customizable Design

The Organization Chart plugin has a fully customizable design, so you can change almost every element style(image, title, description).

You can change the width and height, border radius and position of the image.

Title and description styles are fully customizable as well. You can change the titles’ and descriptions’ font size, line height, letter spacing, font-weight, Font Family.

Horizontal Scrolling

Horizontal scrolling is very important for organization charts. Let us explain why. Most of the horizontal charts’ width is larger than the website width (or a display resolution), so we decided to add this functionality.

You can find this option from the Themes page “General Settings” tab.

Also, there is another view as well – “Mobile view”

WordPress organization chart plugin

WordPress organization chart plugin by WpDevArt has 3 premium plans. All these licenses are for a lifetime, so you need to pay for these licenses only at once. All these 3 plans have the same functionality. The difference is that you can use the Personal license of the organization chart only on one website. You can use the Business license included on 5 websites and the Developer license on unlimited websites.

FREE
FREE
Fully responsive design
Horizontal Scrolling
Standard features
Without Built-in themes
Standard chart elements
Free support
$ 20
PERSONAL
Fully responsive design
Horizontal Scrolling
Premium features
10 Built-in themes
Customizable chart elements
Premium support
$ 40
BUSINESS
Fully responsive design
Horizontal Scrolling
Premium features
10 Built-in themes
Customizable chart elements
Premium support
$ 60
DEVELOPER
Fully responsive design
Horizontal Scrolling
Premium features
10 Built-in themes
Customizable chart elements
Premium support
We accept Credit Cards, PayPal, and Debit Cards payments!

WordPress organization chart

User Manual

Step 1: Installing and activating the organization chart plugin

  • Log in to your WordPress admin panel.
  • Open the Plugins page, then the Add New page and click on the Upload Plugin button.
  • After that, click on the “Choose file” button and select the WordPress Organization chart plugin zip file.
  • Then click the “Install Now” button and activate the plugin.
  • If you have any problem with the plugin installation then contact us using our contact page and we will check the problem.

Step 1.1: Installing the Organization Chart Premium version

  • After you purchase our plugin, the payment page will automatically redirect you to our website again. After that, the download of the premium version will start automatically. If the automatic download doesn’t start, then download it manually(you can find the download button on that page).
  • If you already use our plugin free version, then first deactivate and delete the free version and only after that upload and install the Premium version.
  • If something goes wrong, just let us know and we will resend the premium version.

Video Manual – WordPress organization chart plugin

How to create an organizational chart for WordPress?

Let’s see how to create an organizational chart for your WordPress website. After you installed and activated our plugin, navigate to our plugin admin menu from the left side of the WordPress administration menu(Wpdevart Chart). We will suggest you to create a chart theme at first and then to create the organizational chart.

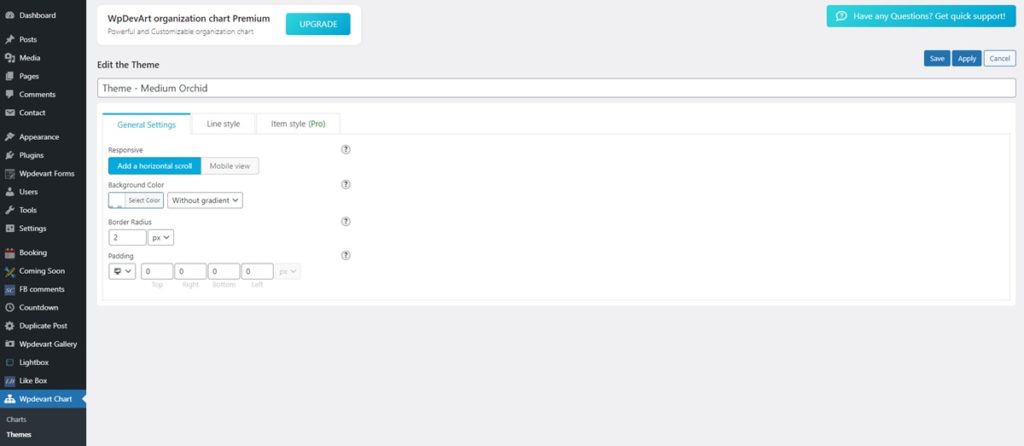
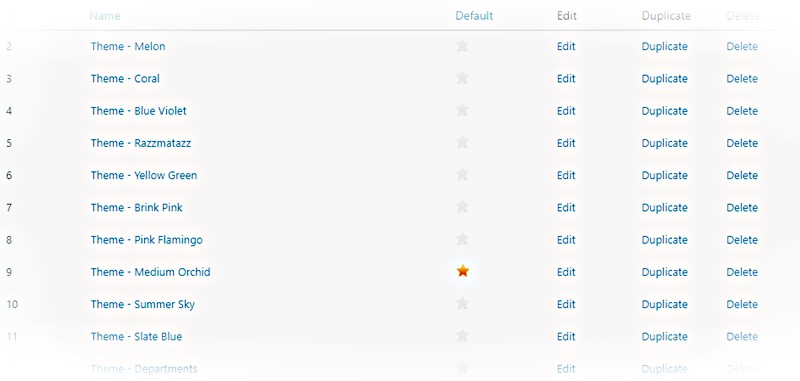
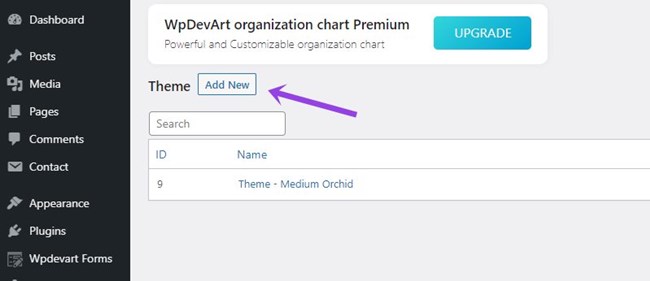
  1. Open the chart themes page from the left side and click on the “Add New” button from the top left side. After that, you will be redirected to the theme page. Type the theme name and check the theme settings. There are 3 settings tab – General Settings, Line style, and Item style. The first two tabs include global settings, the last one includes chart elements settings.

    How to create a chart for WordPress - screenshot 1.1
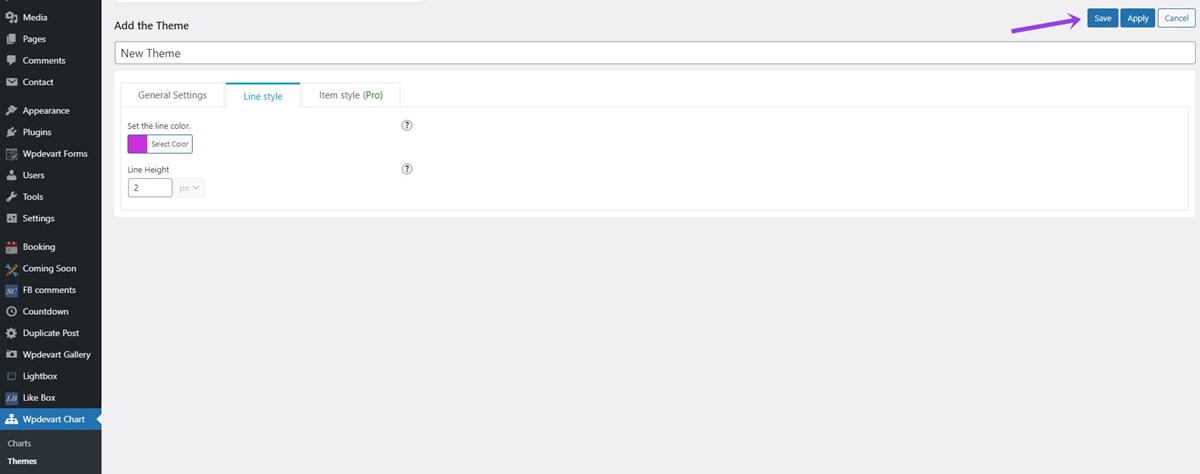
    The first option is the view of the chart when it is bigger than the container. You can choose to “Add a horizontal scroll” or just display the “Mobile view”. From the first tab, you can also set the chart tree background color, border radius, and paddings. From the “Line style” tab you can set the organizational chart line color and line-height.

    The last tab – “Item style” includes most part of the design options. As we mentioned, this tab includes only chart elements styles. From here you can change the element background color, minimum width and height, image width and height, image border radius and margin options. The next option is the “Title font”. If you click on the small icon of the pencil below the “Title font” option, you will see the window of the title font settings. From there you can change the title font family, color, font size, line height, letter spacing, font weight, font style. Also, there is a live preview of the title font below these options. The same font style settings are available for the description field.

    Also, you can find from this tab title and description margin settings and the element border styles. After you configure the theme settings, click on the “Save” button.

    How to create a chart for WordPress - screenshot 1.2

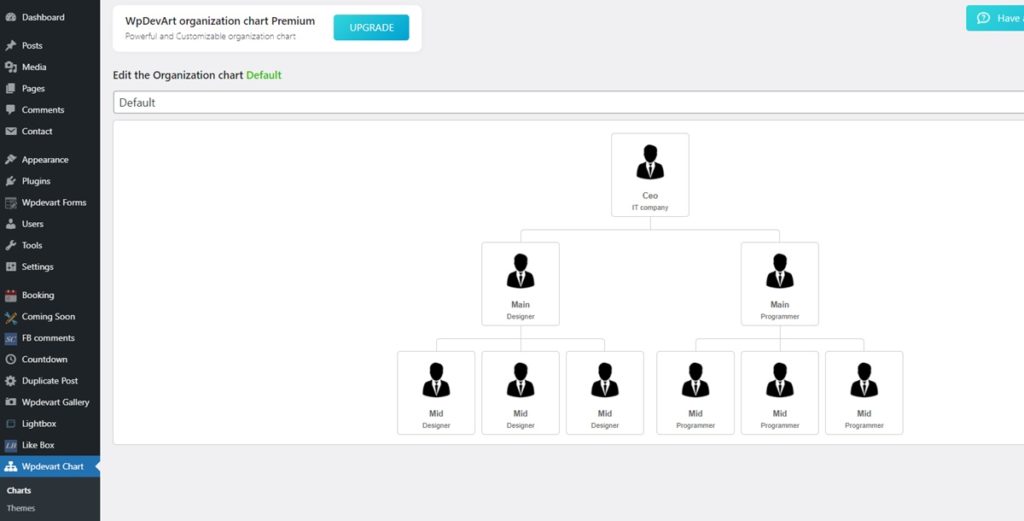
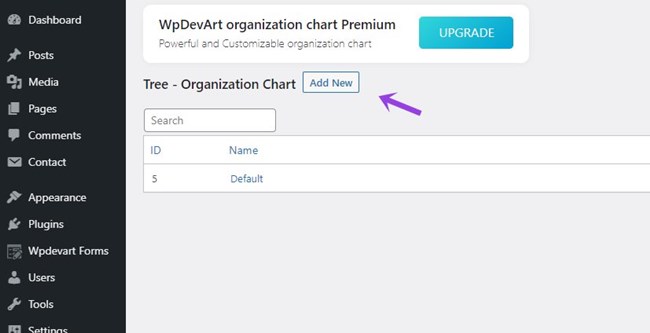
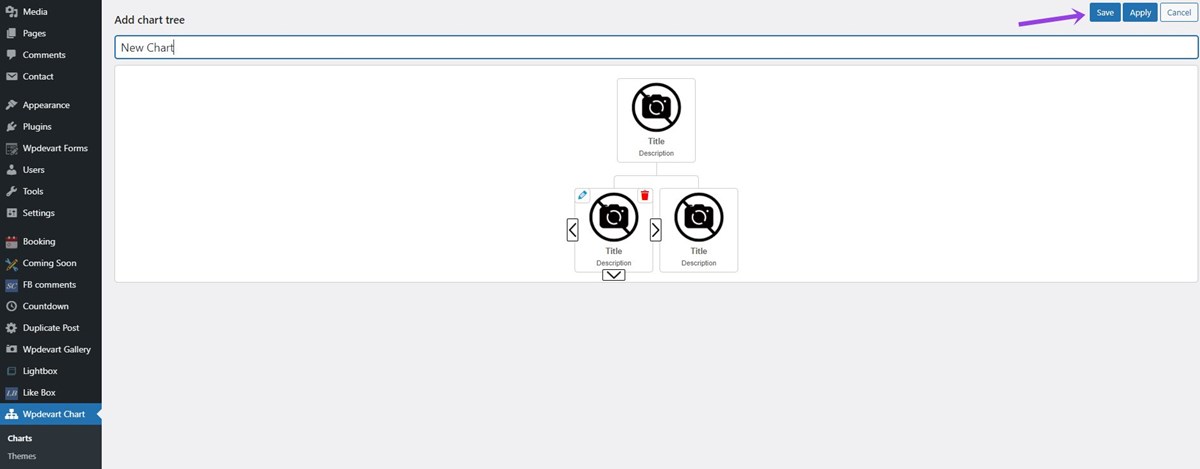
  2. After you created the theme, navigate to the chart page and then click on the “Add New” button. Type the organizational chart name. If you move the mouse to the first element, you will see two buttons – a pencil button(on the top left side of the element) and an arrow button(on the below side of the element). If you click on the arrow button you will see that another element was added to the chart tree. If you move the mouse to the created element, you will see a “Delete” button and two more arrows. Using these three arrows you can create any chart tree you need.
    How to create a chart for WordPress - screenshot 2.1
    Click on the pencil button for configuring the element. There are two tabs – “Information” and “Styling”. From the information tab, you can add the element image, title, and description. From the styling tab, you can choose the theme for the current element. Built the chart and then save it as well.

    How to create a chart for WordPress - screenshot 2.2

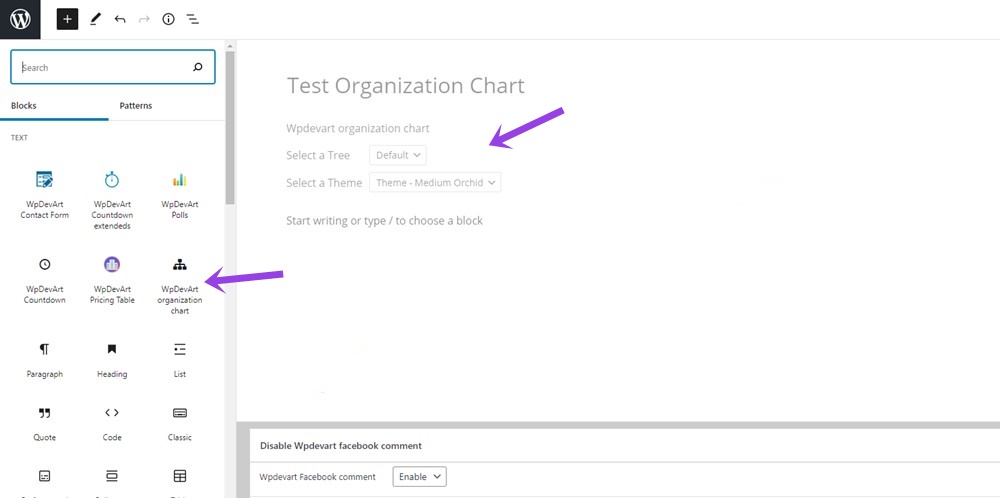
  3. Now we can insert the organizational chart into our post/page. Navigate to the post/page. From the “Blocks” find this icon – “WpDevArt organization chart” and click on it. After that, choose the chart and the global theme. Also, if you want to insert the chart using a shortcode, then you can use this shortcode – [wpda_org_chart tree_id=1 theme_id=1]. The tree_id is the organizational chart id and the theme_id is the chart theme id.

    How to create a chart for WordPress - screenshot 3

That’s all. If you have any questions or suggestions, then use this page for contacting us – Organizational Chart support.

bg

Check the Best Offer from WpDevArt

circle

Screenshots