At first glance, the idea of creating your own blog on WordPress looks simple. However, as soon as you immerse yourself in the world of WordPress, you can quickly understand that it is more difficult than you thought before.
In this situation, there are many beginners who are looking for an answer to the question of how to create their own blog, and some of them may search for alternative platforms.
Although, for creating a blog on WordPress you need some knowledge, however, it will not be so difficult if you don’t have any knowledge. With this guide you can quickly achieve the desired result from scratch and not get lost on the road.
In this article, we’ll look at how to create your own blog and why you need it and help you prepare your copy of WordPress for hosting. And in the end, we’ll go through the settings to customize your WordPress blog to your liking! Let’s get started.
How to create a WordPress blog and why we need it?
Blogging is a multifaceted activity that can enhance your skills as a writer, marketer, developer and even become a project to create a networked online business. If you are a freelancer or a developer, each of these skills can help you to earn more experience, attract more customers and increase your rating.
For example, Tomas L. created five business directions, starting with a blog focused on a unique niche, monetizing it with small offers, and then sell it for a good price. Here are five common ways to make money by creating a blog:
- Advertising: placement of permanent advertising or sponsorship.
- Affiliate marketing: earning money by selling someone’s product.
- Electronic goods: the creation and sale of books in electronic format, plugins, applications, webinars, courses and much more.
- Real products: books, events, training classes, products and so on.
- Services: development, design, consulting, coaching, writing and much more.
In general, even as a freelancer you can benefit by running your blog on WordPress. Here are some other advantages: brand recognition, the feeling of a live site and the ability to gather the interested audience. All this is especially important for beginning freelancers and developers!
In short, creating a blog can give a big boost to starting a career, as well as provide additional opportunities for earning(also, you can check the WordPress Pricing table builder plugin).
How to choose WordPress blog hosting and domain
WordPress is a platform with open source code, available to anyone for downloading on WordPress.org . There you will also find open source topics, plugins, documentation, developer blogs and support forums.
There is also a well-known site – WordPress.com. This solution for hosting and managing the blog on WordPress servers is offered by Automattic, whose founder, Matt Mullenweg, was one of the main creators of WordPress. Although WordPress.com is not the right solution for people who want to have complete ownership and control over their blogs.
To put your own blog on WordPress you need to prepare something. The software is free and open source, but where will you place it? How will people have access to it? This will require the following:
- Suitable hosting.
- Domain name.
- A copy of WordPress (maybe).
Many hosting plans included free domain service, so we suggest starting with choosing the right hosting company. We recommend that you pay attention to such moments that will simplify your life, for example, such as regular backups, installation of WordPress in 1 click and the free domain. Developers will also be interested in the presence of advanced features, such as PHP with PHPMyAdmin support, FTP access(File Transfer Protocol) for file management and SSH access for better server configuration.
With the right set of features, we can quickly launch your blog on WordPress. Once you have chosen the topic for your blog, domain and hosting, it’s time to create your blog on WordPress. Let’s go through important steps.
How to create WordPress a blog – 7 steps
By now you have already chosen WordPress as a platform for your blog, created an account with a hosting and domain and are ready to create your website. All that’s left to do is figure out how to start your blog on WordPress! Here is our detailed guide of seven simple steps on how to create your blog on WordPress and run it(also, check our WordPress Countdown plugin).
1. Install WordPress on your hosting
Very often, hosting is provided by auto installers, which are available in the Hosting Control Panel. There are many combinations, but they all perform the same basic steps.
First of all, log in to your account and in Control Panel find the WordPress Auto-installer section, for example if you are using Hostgator for your website, then you need to find QuickInstall section and install the WordPress.
Choose WordPress in any of the convenient ways and you will go to the page where you need to fill out the form. The field names speak for themselves and so it’s easy to fill them, then click the Install button to start the installation process:
If you want to install WordPress manually, it’s also possible with the famous 5-minute WordPress installation. Here is what needs to be done:
- Download WordPress.
- Create a database and a user with full access rights in their hosting account.
- Download the unpacked WordPress files on the hosting account at the root of your site.
- Run the WordPress installation script by opening the URL where you just downloaded your files.
- Follow the directions and you will succeed!
After installing WordPress, the next thing you want is to look at the default settings.
2. Choosing the default settings in WordPress
WordPress offers a number of options that will help you customize your website site.
WordPress comes with many default settings that you can modify to suit your needs. They will determine how your blog will look and work on WordPress. Having spent a little time to configure these data now, there will be less worry about cleaning later.
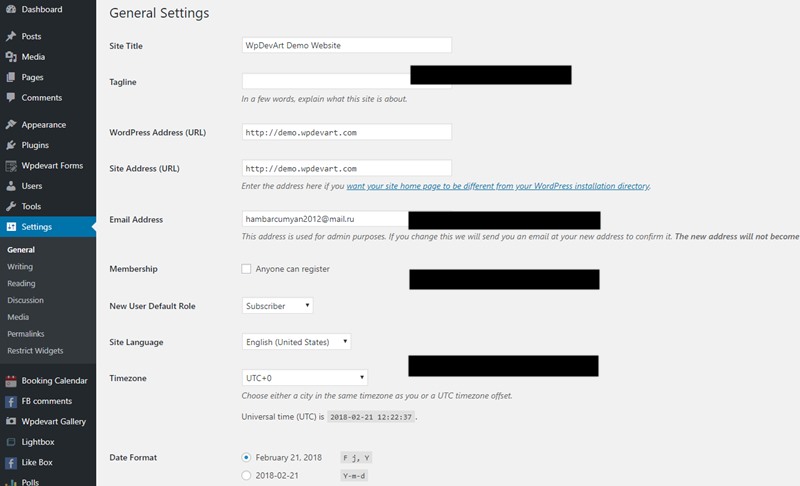
First, log in to the WordPress console. From here go to Settings > General, where you will be presented with a number of default settings. Start by checking the header of your site and its subtitle (Tagline). Although you could already specify them during the installation, but you can also do this here. They represent the name of your blog and its brief description:
Next, check the site language and time zone. If the language of your blog is different from English, switch to the one you need (more than 70 languages available). Selecting the correct time zone is also important, because it determines how WordPress will display your records and set the schedule for publication.
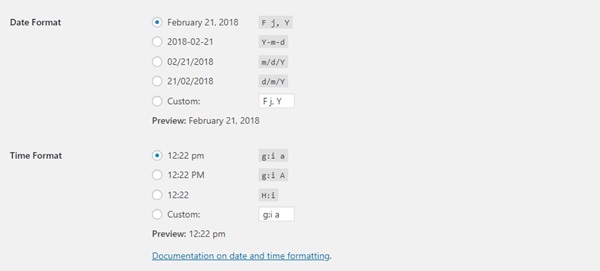
Finally, consider setting the date format. Different regions have different formats, so focus on the target audience. For example, the American audience will be familiar to the format m/d/Y, while the international audience d/m/Y.
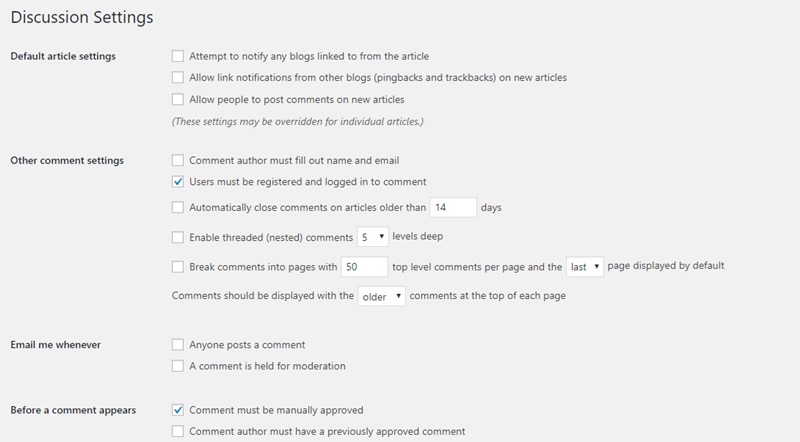
When finished, click Save Changes. Next, go to Settings > Discussion to enable or disable the comment block or set restrictions for specific keywords. You can also choose whether or not to receive notifications by email about the comments. Here, the choice of settings depends on how much time you want to spend moderating the comments. We also recommend disabling automatic notifications and backlinks (pingback), as well as alerts from other blogs:
After configuring the settings, click Save Changes. It’s time to take care of a suitable design for your blog!
3. Choosing a suitable WordPress theme
Now it’s time to choose a suitable WordPress theme. This is essentially a template that sets the design for your site and is the important part of the WordPress. You can change the theme at any time, so do not worry too much about where to start.
Below are a few guidelines that you can use to find the right topic for your blog on WordPress:
- Responsive design.
- The theme should work well in all browsers, and the main WordPress plugins should be supported.
- It should be ready for translation.
- Check for a live support forum for your theme where users quickly get answers.
- Clean code is important for SEO.
- High reviews and testimonials are a good sign because experience speaks best.
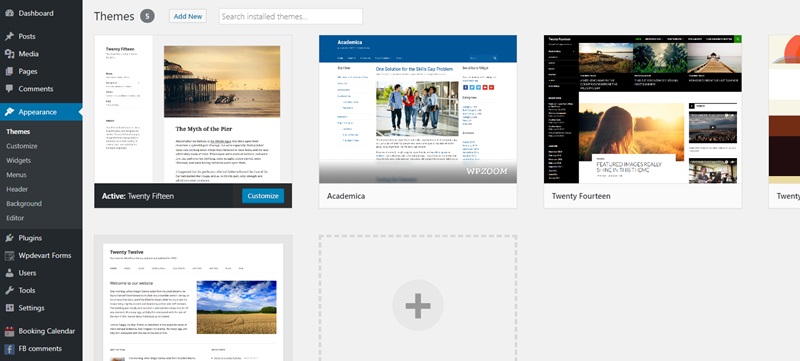
We recommend searching for a suitable theme on WordPress.org themes directory. Once you’ve found the theme, go to the WordPress console and go to the themes setup page(Appearance > Themes > Add New).
In the search field, type the name of the desired theme that you found in the WordPress Theme Catalog. After it you will see the theme you need, hover over it and click Install:
After installation, click the Activate button. Now your theme should be installed!
4. Install some important WordPress plugins
Every WordPress developer has a list of necessary plugins to install. Proper selection of plugins will help you understand how to blog effectively and conveniently. Many of the best and useful plugins are free and open source. For example:
Yoast SEO. SEO is the key to improving Google’s ranking and this plugin is by far the most popular and widely available(check the Best WordPress SEO Plugins list).
WpDevArt Contact Form Builder. This is one of the most useful plugins on WordPress.org. It will allow you to create contact form quickly, just in 2-3 minutes.
WpDevArt Responsive Image Gallery. Again one of the most suitable plugins for creating galleries, just try it and you will like this plugin.
Google Analytics Dashboard for WP. This plugin offers a quick way to embed Google Analytics into your WordPress blog and easily track website traffic.
Countdown Timer – Extended version. If you need to create Countdown or Countup timer, then you should have this plugin. There are a lot of settings that necessary for a nice Countdown timer.
WpDevArt Booking Calendar. This plugin is the best solution for reservations. You can create strong booking system with this one.
Akismet. Spam is the curse of many site owners and this plugin computes spam in comments based on the community database. This is another solution from the developers of WordPress.
Wordfence Security. Probably, this is one of the most necessary plugins that you can install. This is a multifunctional plugin that will help protect your site from unauthorized entry into the system and hacking, not allowing certain malicious IP-addresses to gain access to your site and much more.
Installing the plugin is similar to installing a WordPress theme. To get started, go to Plugins > Add New in your WordPress console, then Upload(if you have the plugin zip file) or use the search bar for finding and installing the plugin you need.
5. Writing and publishing the first blog post
Now when all the tools are at hand, and we have almost answered the question of how to create your own blog, it’s time to start creating and publishing content for your site! This is important to do at this stage for a number of reasons. First, you can see how it all looks on your website with real content. Second, you will not postpone the moment the exits of your message to the world. Finally, it is important to remember that working on improving your website is an ongoing process. You can spend the rest of your life tuning the site and will never feel satisfied. That’s why content should always go first(also, check The 50 Best WordPress Plugins list).
Here is an example of a guide to writing your first blog post:
- Choose the subject of the blog post.
- Write your headline, give the keywords you would like.
- Write your own publication!
- Include a Call To Action (CTA) for comments, feedback, or subscriptions at the end of the publication.
The length of your recording is not so critical, so use as many words as you need to create your post. The end result should be informative or interactive or give some value to the reader.
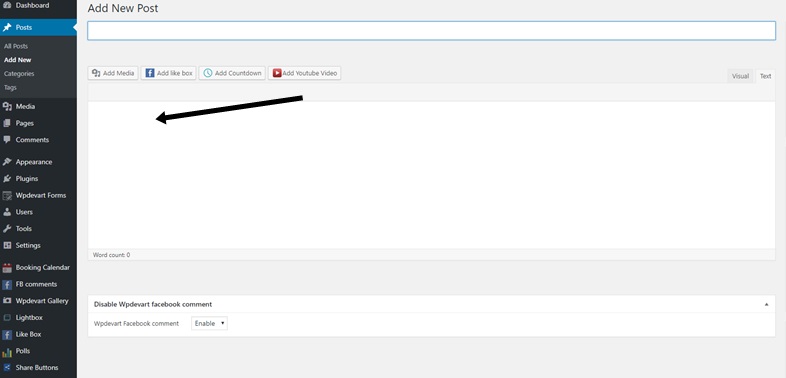
Once you write your first publication, you’ll want to add it to your WordPress! Start at the Posts page > Add New in your WordPress console. Add a title in the top field and place the content in the large text area below:
Then, using the Add media button, upload any images, videos or other media content to your post. Then save the post.
6. Customizing WordPress Blog Front-end
At this point, you are almost ready to start sharing your content! Nevertheless, there are several final settings that will make your website even more convenient and they can be done before the official launch.
Customizing your site will most likely be limited to setting up your chosen theme. Most themes support several basic settings, some also provide additional options. Ideally, you choose a theme that suits your goals from the very beginning, but, using the options available to you, you can create an even more convenient website.
To go to the configuration interface in your WordPress console, go to Appearance > Customize. After that, you will see a page with a preview of your site and a new list of settings in the panel on the left.
It is important to know that each theme can have different settings in this case. We recommend starting experimenting with choosing the provided color, background or font settings to make sure that your theme matches your corporate style in the most accessible way. Some themes even allow you to upload a logo.
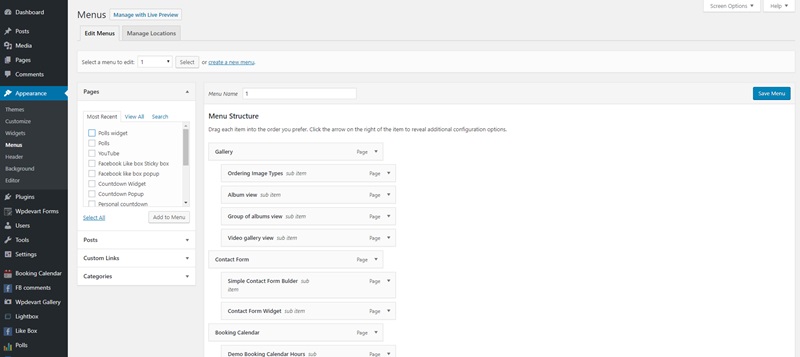
Finally, you may want to set a custom menu or other important settings. To do this, find the Menu tab in the Appearance Settings panel. If you have not created a menu yet, first add your menu. Here you can add pages, post, categories and even custom links to your menu.
7. Planning the future actions for
If you have gone through the steps above, you should now have a WordPress blog. Nevertheless, the work does not stop here – there are a few more steps that we want to consider before moving on.
First of all, estimate how often you are going to your blog and what you plan to write about. You will also need to evaluate the effectiveness of your blog. This means that it should boot quickly and look great on all devices.
It is also important to think about the security of the site. It’s a good idea to learn from your host about installing an SSL certificate, which will be simply necessary for e-commerce and help protect your visitor data from interception by hackers(also, check this interesting post – BuddyPress VS bbPress).
Finally, you will certainly want to know how to attract visitors to your blog. Several powerful strategies for effective SEO promotions are the application of social networks and email marketing. To integrate this into your WordPress blog, be sure to use all the features from Yoast SEO, add the share buttons to your site and think about using a service like MailChimp to create a base for your email subscribers.
Now you are completely ready to set up and launch your own blog on WordPress.

