We have already introduced to you what is PHP.INI. This time, we’d like to continue this tutorial to tell you how to modidy PHP.INI files with the help of cPanel control panel which is supported by almost all the reliable web hosts.
The PHP.INI file is a special configuration file for PHP that is used to customize the behaviors and declare the changes of your PHP settings. Generally, your administrators will configure the web server with the standard and the most optimal settings for PHP, such as the uploading directory, global variables registration, errors display, maximum uploading, maximum script execution time, and many other configurations. Therefore, you’d better modify the PHP.INI file only in the case that you have to change one or more settings to meet your exclusive needs (also, check this powerful WordPress Countdown plugin).
Here, we simply assume you really need to edit this file, thus have compiled a step-to-step guidance in the following telling you how to do this with the help of cPanel control panel.
Modify PHP.INI with cPanel
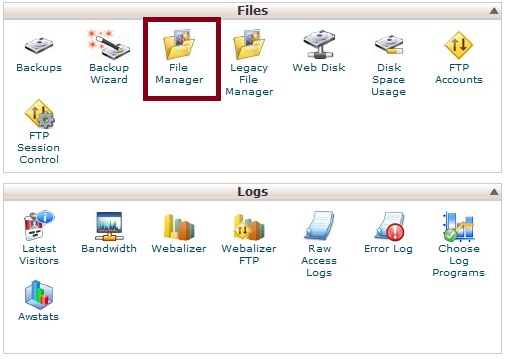
In the very beginning, you need to log into your cPanel control panel and scroll down to find the File section like the image showed in below. In this category, there is an option of File Manager available, with which you can find an easy-to-use Code Editor (also, check this useful post – How To Add Rich Snippets to WordPress).

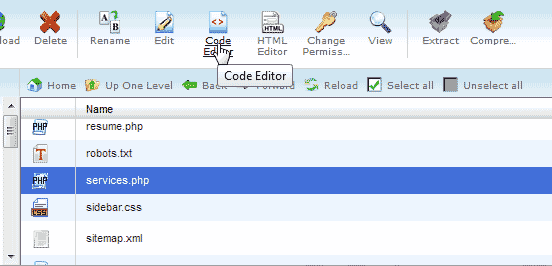
Then, you need to navigate to the right directory and open up your PHP.INI file using the Code Editor. You can select the file and then hit on the Code Edit icon in the navigation bar of the File Manager to open this file, or simply right-click the file and choose the Code Editor from the menu appeared (also, you can check our WordPress Coming Soon plugin).

After opening the PHP.INI file, you can modify the code as you wish. Generally, the most common parameters changed in this file are:

After changing the settings, don’t forget to click on the Save Changes button in the top corner of the right hand to save all the changes made by you (also, you can check our WordPress Pricing table plugin).
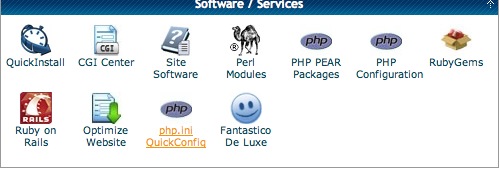
In addition to File Manager, you can also make use of the php.ini QuickConfig in cPanel. This option can be found in the Software/Service section. After enabling this tool, you can change the settings within your PHP.INI file and save the modifications with ease.

Create a PHP.INI File
In fact, webmasters can have a PHP.INI file only when they are running a web server with PHP loaded as a CGI Module. It will be located at /usr/local/lib/php.ini inside your public_html folder. If you fail to find this file existed in your publick_html, then you’d better contact your hosting provider and ask the support staff to create one for you (also, check this interesting post – BuddyPress VS bbPress).
In addition, you can also create a new text file and assign it as your PHP.INI file. To do this, you need to follow four steps listed in below.
- Create a new file with the help of a text editor. Here, we highly recommend Notepad or the File Manager of cPanel control panel. Remember to rename it to php.ini.
- Upload this file using your FTP or cPanel’ File Manager and locate it at your public_html directory.
- Add the following lines of code to your primary .htaccess file to protect the PHP.INI file. You can find it from /home/username/public_html/.htaccess.

- In the .htaccess file, add the coding stuff listed in the following. Remember to change the “username” to your cPanel username (also, check this useful tutorial – How to Install a WordPress Theme?).

